If you’ve been following our series on EV conversions, you already know there’s an exciting balance of art and engineering behind every project. By now, we’ve talked about selecting the perfect donor vehicle, designing your powertrain, and choosing essential components like motors and batteries—now what? Charging your EV and making sure all the accessories work as intended are the next critical steps. But charging isn’t just plugging in a cord, and auxiliary systems aren’t just “extras.” They’re essential for your vehicle to function safely, reliably, and comfortably.
Let’s explore how charging equipment and auxiliary systems form the hidden backbone of your EV conversion, making it not only operational but also enjoyable to drive.
Charging Equipment—Giving Your EV Life
What is EV Charging Equipment?
Arguably one of the most contentious topics in today’s automotive industry, EV charging is not as simple as it sounds. Luckily, it’s not as complex as some people think, either. What makes it complex, though, is the comparison one tends to make between refueling a gasoline or diesel powered vehicle and charging an EV. There’s no “slow fueling” an ICE vehicle, nor is there “fast fueling” for that matter, but those concepts do apply for charging an EV.
But none of those comparison or concepts matter to your EV conversion: you need to make sure your charging is as fast as you need it to be. Your requirements for this will depend on your Engineering Decisions, and your Component Strategy (battery pack selection specifically).
How so? Well, your battery pack will dictate the voltage your charging equipment will need to provide, as well as the total energy it can hold and how fast it can accept it. Your Engineering Decisions will dictate the range and expected use for this vehicle. It’s not the same thing to have to charge your conversion for a Cars and Coffee event 15 miles away on Saturdays during the summer, than to have to charge your daily driver for an 80 mile round trip every day, even during winter. Charging time matters!
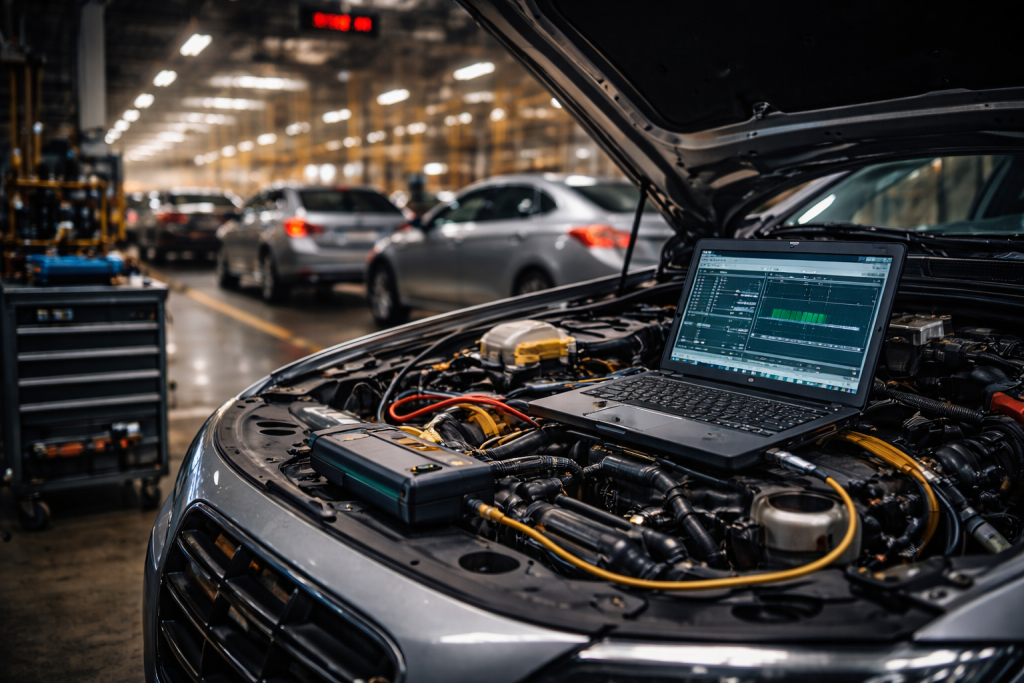
On-Board Charging Module (OBCM)
The On-Board Charging Module (OBCM) might not be the flashiest part of your EV conversion, but it plays a pivotal role in making your build practical and enjoyable for everyday use. Think of the OBCM as the bridge connecting your home’s electrical supply (AC power) to your battery pack (which needs DC power). It’s essentially a smart transformer, converting alternating current (AC) from your house into direct current (DC) that your batteries can store. Choosing the right OBCM isn’t complicated, but it requires attention to a few key specs: voltage, current, power rating (measured in kilowatts or kW), and efficiency.
The voltage rating of your charger must match your battery pack’s nominal voltage—whether that’s 96V, 144V, or even higher. Some chargers have programmable output voltage within a certain range, some don’t, so make sure to check with the manufacturer of your part before making any purchase! Next up is power output, typically ranging from about 3kW for smaller, basic conversions to 22kW for high-performance setups. This rating directly impacts how quickly your battery can charge.
Here’s a quick, practical example: if your battery pack has a capacity of 30kWh and you pick a common Level 2 charger rated at 6.6kW, charging your battery from empty (0%) to full (100%) would theoretically take about 4.5 hours (30kWh ÷ 6.6kW ≈ 4.5 hours). Realistically, add around 10-15% extra time due to efficiency losses, meaning you’ll be plugged in for about 5 hours. Efficiency is crucial—it dictates how much of the electricity from your wall actually makes it into your battery pack, and how much gets lost as heat.
When selecting an OBCM, carefully review its specifications and compatibility with your chosen battery chemistry and voltage range. Also, consider the available electrical supply at your home or workshop: a more powerful charger might require a dedicated circuit or even an upgrade to your electrical panel. Make sure to pick a reliable brand—saving a few bucks upfront on a cheap charger may mean dealing with headaches down the road. Remember, your OBCM is part of your EV, not your at-home charger, so if it doesn’t work well, it won’t work well in ANY charging station you try. This is a component that will significantly affect your EV’s usability, charging convenience, and ultimately your satisfaction with the project.
Off-board Charging Stations
While your On-Board Charging Module (OBCM) plays a vital role converting household AC power into DC for your battery pack, it’s the external charging station that will shape your day-to-day experience. Understanding these chargers is straightforward, but selecting the right one involves balancing convenience, charging speed, complexity, and of course, your budget.
First, we have Level 1 charging, which is essentially plugging your EV into a regular 120V household outlet. Think of this as the slow cooker of EV charging: convenient, low-cost, but it takes time. Lots of time. A typical Level 1 setup provides around 1 kW, meaning a modest 30 kWh battery pack could take nearly 35 hours to fully charge. If your converted EV is just a weekend cruiser or you drive fewer than 30-40 miles per day, this slow and steady approach might be more than enough, especially since you’re charging overnight anyway. No extra installation, minimal complexity, and it won’t break the bank—just plug it in overnight, and your EV will be ready for another day around town.
But let’s say your EV sees more use—maybe it’s your daily driver or your weekend warrior, and you want faster, more convenient charging. That’s where Level 2 chargers come into play. Operating on 240V power (like your clothes dryer or electric oven), Level 2 charging systems can deliver anywhere from about 3.3 kW up to 22 kW, though most DIY conversions stick to something around 6.6 kW. Continuing our earlier example, with a 30 kWh battery and a 6.6 kW charger, you’re looking at roughly 4-6 hours to go from nearly empty to fully charged. The biggest upside here? Convenience. If you install a Level 2 charger at home, every morning you’ll wake up to a full battery without the hassle of extended waiting periods. Sure, installation requires a bit more upfront investment—think dedicated 240V wiring and potentially a professional electrician—but if your EV is part of your daily routine, the cost is well worth the investment. Keep in mind, however, that your Level 2 charging station does not define the charging speed of your battery, that’s the OBCM. If the OBCM is rated at 3.3kW, for example, and your Level 2 charging station is rated at 12kW, it won’t charge the battery at 12kW, it will charge at 3.3kW. On the flipside, if your Level 2 charger is rated at less power than your OBCM, then your battery charging power will be limited by the charging station. It’s recommended that your Level 2 charging station power matches or exceeds that of your OBCM.
Finally, let’s talk about DC Fast Charging (Level 3+ charging)—the powerhouse of the EV charging world. If Level 1 was your slow cooker, DC Fast Charging is your microwave: blazing fast, super convenient, but a bit more complicated and costly. A DC fast charger bypasses the OBCM entirely and sends high-voltage DC directly into your battery pack, charging it from nearly empty to 80% in as little as 20-30 minutes. But there’s a catch: not every battery pack or EV system can handle such rapid charging without specialized (and often expensive) battery management systems. For most DIYers, incorporating DC fast charging is a significant leap in complexity and budget—typically involving advanced battery management systems (BMS), thermal management solutions, and ensuring your battery cells can handle rapid charging rates safely. The DC Fast Charging station should also communicate with your BMS and sometimes your EVCU, or Electric Vehicle Control Unit (if equipped), in order to allow charging. Some DC Fast Charging brands, like EVGo, have recently banned EV conversions from using their charging network (https://cleantechnica.com/2025/03/13/evgo-no-third-party-adapters-or-ev-conversions-allowed/)
When selecting your charging solution, think carefully about your actual needs, budget, and how you plan to use your EV. For most DIY conversions, Level 2 charging hits the sweet spot of practicality and affordability. However, if your conversion is your dream road-trip machine or a long-distance cruiser, investing extra resources into DC fast-charging capabilities might make sense. On the other hand, if simplicity and affordability are your top priorities, Level 1 could serve you perfectly. Like everything in automotive engineering—and in life—it’s all about balancing your goals, budget, and a sprinkle of common sense.
Selecting Your Charging Equipment
Now that we’ve covered the basics, let’s sum them all up in a very quick and concise step-by-step protocol.
Step 1: Determine OBCM output voltage and power
Assuming your battery pack has a nominal voltage of 96V, your OBCM should be slightly above this. Most OBCMs aimed at EVs are rated for nominal battery pack voltages, so look for one that matches your pack: it should be able to output a slightly higher voltage in order to charge it (remember current flows from higher voltage to lower voltage, so if both the battery and the OBCM were exactly at 96V, the current flow will be minimal. The charger needs to have a slightly higher output voltage!).
Step 2: Determine your charging speed (OBCM power rating)
Now, power is relatively easy to select given the fact that most OBCMs are rated at 3.3kW, 6.6kW, 7.6kW or 11.6kW, give or take. If you are looking for the cheapest component, go for the lowest power rating. If you’re looking for the fastest charging time, go for the highest power rating.
But if you’re into doing some math, let’s do a quick calculation:
Assuming your battery pack has 30kWh of usable energy, and you want to charge from 0% to 100% (not recommended, as mentioned in our article about battery packs, but makes math simple here) in 4 hours. That means 30kWh ÷ 4 hrs = 7.5 kW of OBCM power output is what you need. Need something faster? Go as high a power rating as you can get!
Step 3: Check charger efficiency and compatibility
Make sure your charger exceeds at least 90% efficiency. Rememeber, the less efficiency, the more heat is generated, and that’s lost energy and time! Also compatibility: is your OBCM compatible with your CAN network (if your conversion has one)? Are your connectors the right ones? Is it programmable or does it need a ‘master controller’ to dictate what it does?
Auxiliary Systems—More Than Just Extras
Auxiliary systems maintain vehicle functionality and comfort, and neglecting them can turn a well-executed conversion into an inconvenient or unsafe ride. I’d like to bring your attention back to our first article of this series, were we laid out our theory of EV conversions in the modern era as enjoyable expressions of engineering, more so than A-to-B basic transportation. Under this premise, it is absolutely paramount that driving this hypothetical machine is an enjoyable experience, whatever that means to you. If you feel like you need Air Conditioning, a good sound system, power steering and a big screen to enjoy this hypothetical EV conversion, then, by all means, please plan for it. On the flip side if you think you need nothing but pedals, a steering wheel and something reminiscent of a seat, that’s what you should get. But above all, consider safety!
With that editorial out of the way, let’s get into what Auxiliary Systems are, and what you might need them for.
Essential Auxiliary Systems
The full functionality, outside of just powering the wheels for motion, of any EV requires the following components:
- DC-DC Converter: this acts like the alternator of an ICE-powered vehicle; it feeds all low voltage electrical systems.
- Brake Vacuum Pump: this gives power to your brakes so you can easily actuate them through the brake pedal.
- Power Steering System: this system allows for easy manipulation of the steering wheel to change direction of the car while driving.
- Air Conditioning (A/C) system: this conditions the air in the cabin to allow for a more comfortable driving experience. This includes heating and cooling.
DC-DC Converter: Powering the Essentials
The DC-DC converter is your EV conversion’s equivalent of an alternator—except, instead of being belt-driven by an engine, it converts the high-voltage DC from your battery pack down to a stable 12 volts to power your vehicle’s accessories. Everything from your lights, radio, gauges, to wipers relies on this converter.
Selecting the right DC-DC converter involves looking at two main things: power rating and efficiency. Typical DIY conversions use converters rated between 500W and 3000W, depending on how many accessories your vehicle has. If you’re running basic electronics, a smaller 500–1000W converter might suffice. However, if your build includes powerful audio equipment, electric power steering, or multiple accessories, you’ll want something closer to 1500–3000W. Efficiency matters too, since wasted energy turns into heat, reducing your overall driving range and potentially causing thermal management headaches. Aim for converters with efficiency ratings of 90% or higher to keep things cool and efficient under the hood.
Brake Vacuum Pump: Keeping Your Brakes Safe
When you remove the internal combustion engine from your donor vehicle, you’re also removing its built-in vacuum source, which your brakes depend on for power assistance. Without vacuum, pressing the brake pedal can feel like trying to squeeze a brick—definitely not safe, and certainly not enjoyable. That’s where a brake vacuum pump steps in, providing consistent vacuum pressure to your brake booster to maintain that smooth and responsive brake feel you’ve come to expect.
Selecting a vacuum pump for your EV conversion isn’t too complicated, but it does require a bit of thought. Typically, automotive brake systems need a vacuum level of about 18–25 inches of mercury (Hg) and a flow rate of around 1.5–3 cubic feet per minute (CFM). For most conversions, you can keep it simple and reliable by using a vacuum pump from an existing EV or hybrid car with similar brake booster size and weight characteristics—think of a Chevrolet Volt, Nissan Leaf, or even a Tesla Model 3. These are readily available second-hand, proven to work well, and generally affordable.
If you’d prefer doing it by the numbers or you’re tackling a less common vehicle, start by consulting your donor vehicle’s service manual to determine the original vacuum level and booster size. No manual? No worries. A quick test with a vacuum gauge on the booster of a similar-sized vehicle can give you a solid benchmark. Once you’ve got your target vacuum level, match it with a vacuum pump that meets or slightly exceeds this requirement. It’s always safer—and smarter—to have a bit more vacuum and flow capacity than you think you’ll need, ensuring reliable braking power even under heavy or repeated braking conditions.
Remember, your EV conversion isn’t just about speed and range; safety and driveability matter just as much. Don’t skimp on your brake vacuum pump—your stopping power literally depends on it!
Power Steering System
When selecting a power steering system for your EV conversion, the simplest, most straightforward solution is to keep your original hydraulically-assisted steering rack and just swap the engine-driven hydraulic pump for an electric-powered hydraulic pump. This solution avoids the hassle of replacing your steering rack entirely and ensures compatibility with your vehicle’s existing steering geometry. You can easily source second-hand electric hydraulic pumps from vehicles like the Toyota MR2, Volvo S40, or certain European vehicles that came with electro-hydraulic setups.
As an alternative—though admittedly a bit more complex—you might consider swapping in a fully electric power steering rack or assist-column system from a similar-sized EV or hybrid vehicle like a Chevy Bolt or Toyota Prius. This option eliminates hydraulics entirely, reducing complexity and maintenance. Whichever route you take, keep in mind critical factors like vehicle weight, tire width, and desired steering effort to ensure the selected system has enough power and responsiveness. Also, don’t overlook the electrical power demands of your setup—bigger pumps or fully electric racks require higher current, which could impact your range and battery sizing. Always choose slightly more capacity than you initially calculate, especially if your build involves performance driving or larger-than-stock tires.
HVAC Systems (A/C Compressor and Coolant Heater)
In your EV conversion, comfort isn’t a luxury—it’s essential. Without the heat from a gasoline engine, your car will need fully electric HVAC components, including an electric compressor for air conditioning and an electric coolant heater for warming up the cabin.
A/C compressors: In EV conversions, the electric compressor typically integrates directly into your original A/C system, leveraging existing hoses, the evaporator, and condenser. Usually, minimal modification is required, making installation relatively straightforward.
Coolant heaters: These units usually heat up the heater core circuit, which the majority of modern donor cars already have, and will require a small coolant pump to circulate the warm fluid across it.
Selecting these components starts with understanding your needs: consider your vehicle’s interior size, typical passenger count, and climate conditions. If you’re building a small weekend cruiser and live somewhere temperate, you probably won’t need a powerful compressor or heater. However, if your EV is your daily driver in extreme climates—hot or cold—you’ll need more robust systems. Most DIYers keep things straightforward by sourcing second-hand electric compressors and coolant heaters from factory EVs or hybrids, since they’re already proven reliable and sized for typical passenger car cabins. As with all the other auxiliary systems, always choose slightly higher capacity than your initial calculation suggests; it’s better to have a bit more power available, ensuring you’re comfortable and your EV conversion remains enjoyable year-round.
Calculating Auxiliary Loads
So after all these systems have been added, your electrical needs have changed. You now need to know what the peak power consumption is (in kW) for each component, and every other component that was alrady in the donor car. Lights, power windows, screens, you name: if it uses electricity you should be able to at least estimate its power consumption. This will dictate 2 main things. 1) your DC-DC converter rating and 2) the impact these component might have in your range when in use!
Quick Summary of Auxiliary Systems
| Auxiliary System | Why It’s Needed | What to Consider When Selecting |
| DC-DC Converter | Converts high-voltage battery power down to 12V for accessories (lights, radio, gauges). | Choose a power rating (500–3000W) matching your accessory load; aim for at least 90% efficiency. |
| Brake Vacuum Pump | Provides vacuum to maintain proper brake booster function, ensuring brakes feel responsive and safe. | Select a pump providing about 18–25 inches Hg and 1.5–3 CFM. Simplest method: source from a similarly-sized EV/hybrid vehicle. |
| Power Steering System | Ensures steering remains easy and responsive without the original engine-driven pump. | Simplest option: replace engine-driven pump with an electric hydraulic pump. Alternative: Fully electric rack. Consider vehicle weight, tire size, and electrical load. |
| HVAC System (A/C Compressor & Coolant Heater) | Provides cabin heating and cooling, crucial for comfort without engine heat. | Match compressor and heater capacities to cabin size, passenger load, and climate. Sourcing second-hand units from existing EV/hybrids simplifies installation. |
Conclusion: Charging Ahead with Confidence
Selecting charging equipment and auxiliary systems might not feel as exciting as choosing your motor or battery pack, but it’s every bit as crucial—and rewarding—in the long run. These choices impact not just your EV’s usability but its personality too. Remember, your EV conversion is an expression of both engineering and creativity, and thoughtful decisions here ensure your build is safe, reliable, and enjoyable to drive. Up next, we’ll move into the wiring and cooling systems, tying everything together and inching closer to hitting the road in your electric dream machine.
Join the conversation: share your thoughts, ask questions, or tell us about your EV conversion journey or plans in the comments below. We’d love to answer any questions we can and/or learn from your experience.
End of Line – A story
Ah, the beauty of an assembly plant. Cars roll out by the minute, synchronized with…

PLAN – Designing an EV conversion from scratch: a SPARK walk through
Now that we’ve defined what we want this conversion to accomplish, we can start working…

Cold Trips – a story
Boring. Dark. Cold. The industrial warehouse where we sat was furnished to resemble a corporate…

Select – A SPARK walkthrough :Designing an EV conversion from scratch
Ah, EVs. Magical to some, blasphemous to others. Few topics divide the automotive world quite…

Stalls – a story
It was a chilly Pennsylvania morning. Jamie was late to work again; he forgot to…

Redemptive Voltage: 5 EV Conversions That Give Souls To Their Donors
Some cars are born with a soul. A few are rowdy and unhinged, some are…